How to Set Automated Messages for Working and Non-Working Hours
Step 1
Open your Chatway dashboard and click on the settings icon located at the top of your Chatway profile picture in the bottom left corner.

Step 2
the Widget Settings section, scroll down and select “Set automated messages.”

Step 3
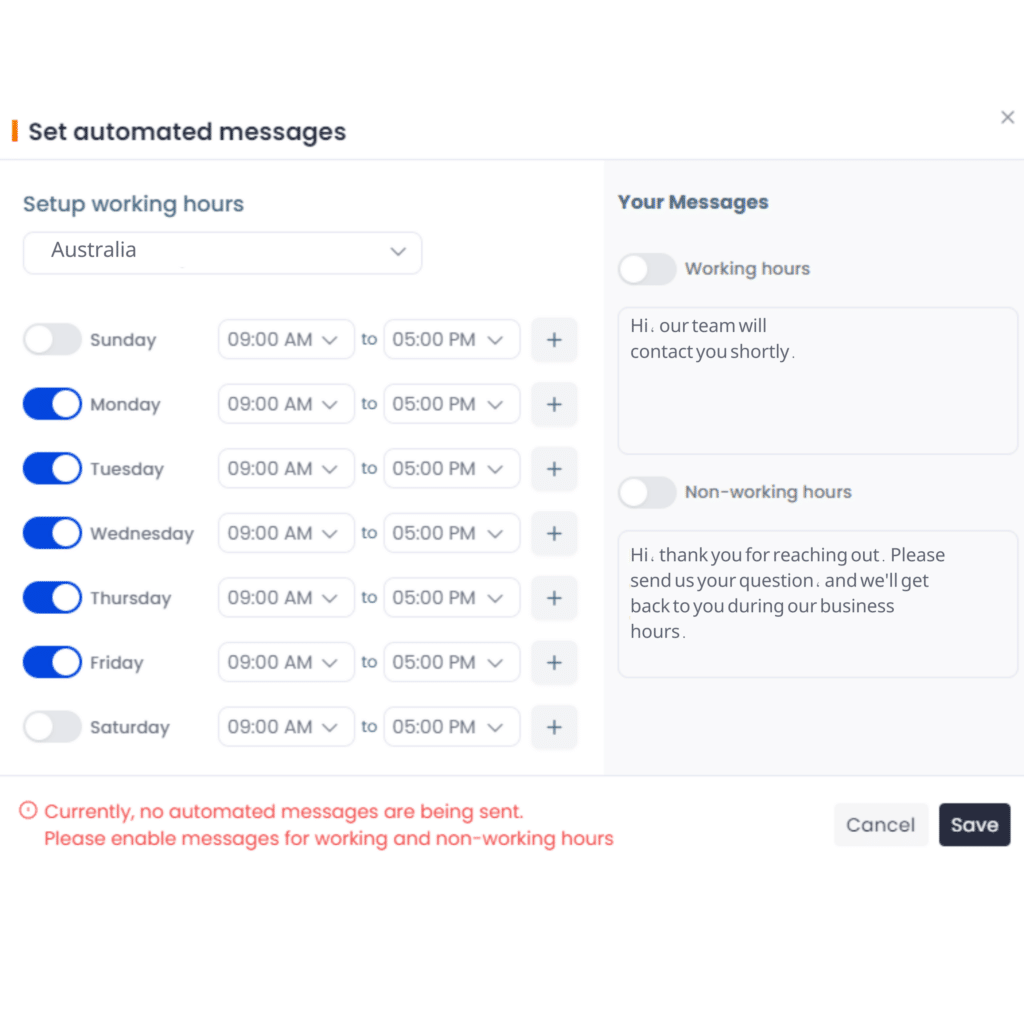
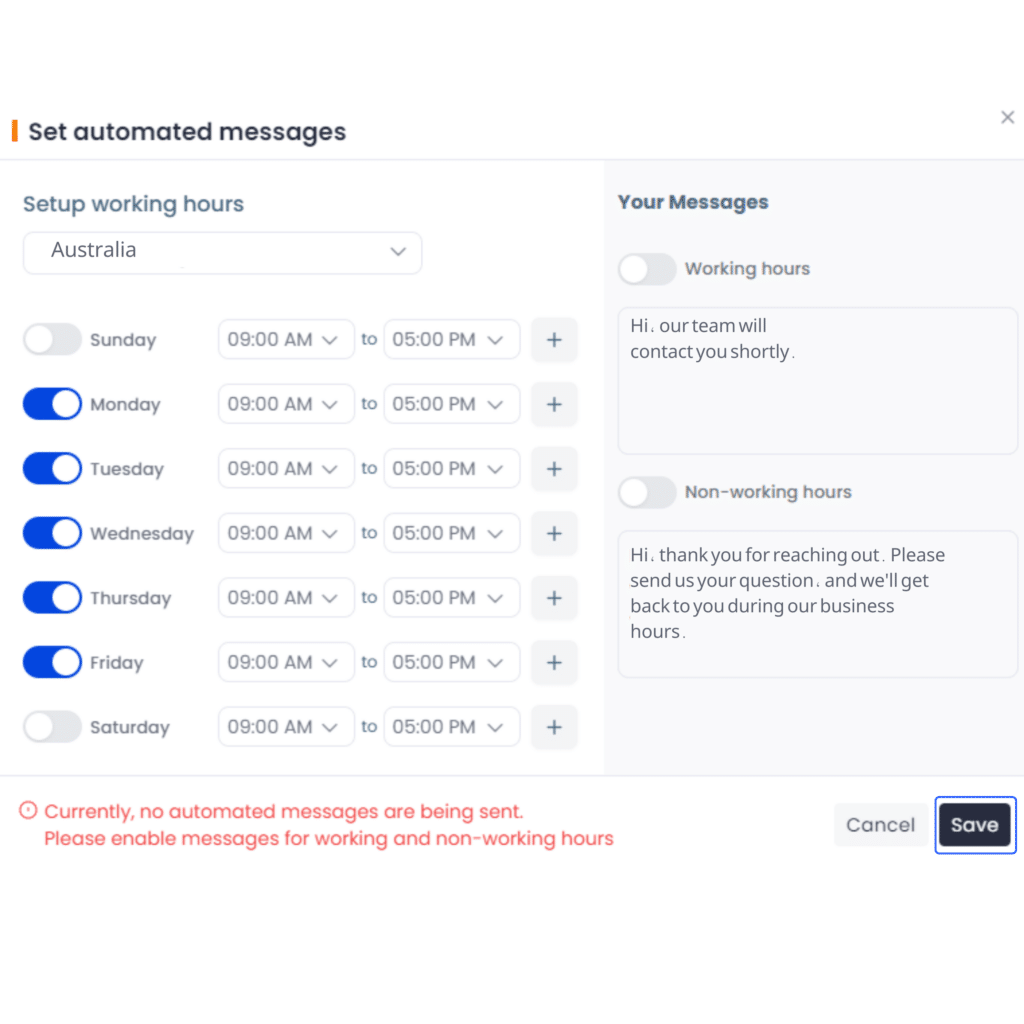
A window will appear where you can set your working hours.
Step 4
On the right side, you’ll find a toggle switch to enable automated messages for both working and non-working hours. You can also customise the message here.

Step 5
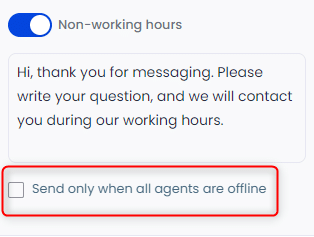
There’s an additional option for automated messages during non-working hours to send the message only when all agents are offline.
Step 6
Remember to click “Save and Publish” in the widget settings for the changes to take effect.
The screenshots below show how your settings will appear based on your customisations:
During working hours:

During non-working hours:


